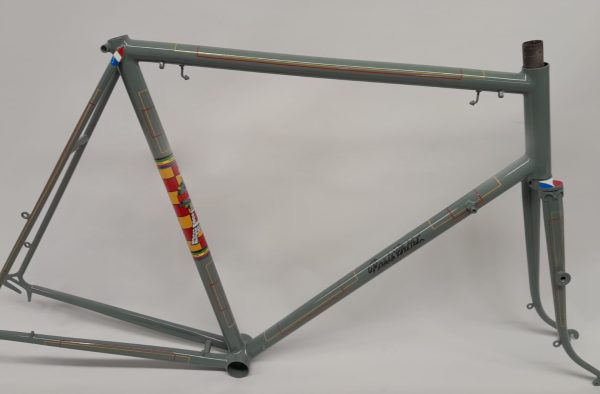
We often take care of rare, old and unusual frames in the workshop for renovation, this Paris came in on behalf a customer from our oldest retail partners, Madgetts Cycles in Diss, Norfolk and was quite a memorable piece of work. This was a real labour of love, needed a lot of tlc and time to get it right, definitely a challenge!
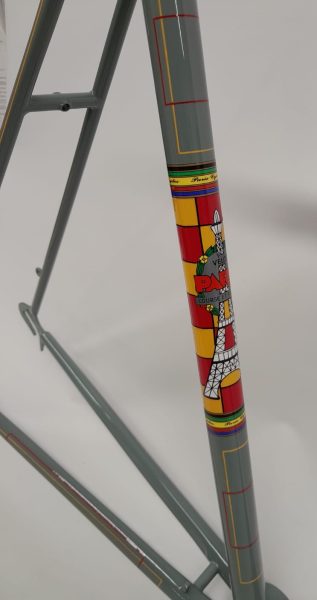
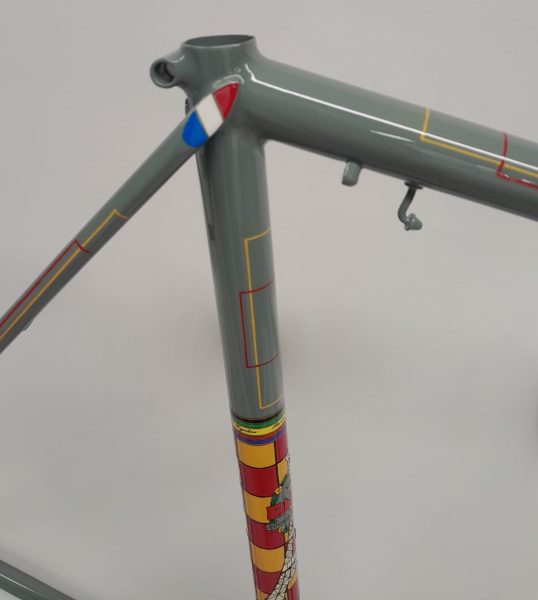
Firstly, lots of photos and measurements were taken of the frame and the box lining which was on all tubes, stays and forks. The original box lining looked red and white but was in fact red and yellow to match the checker seat tube panel.
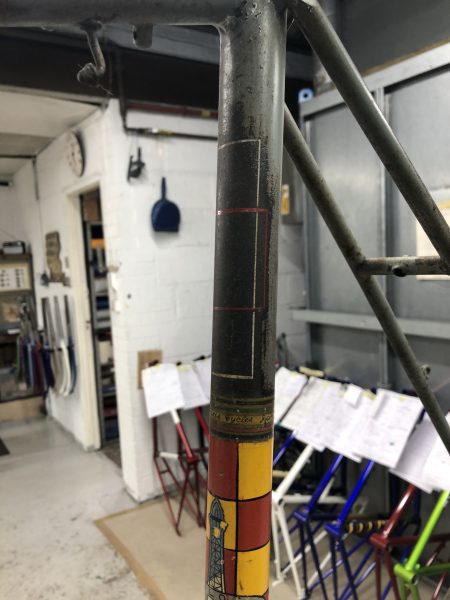
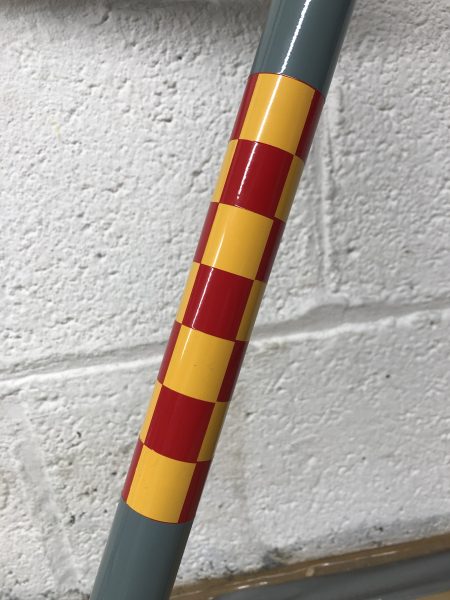
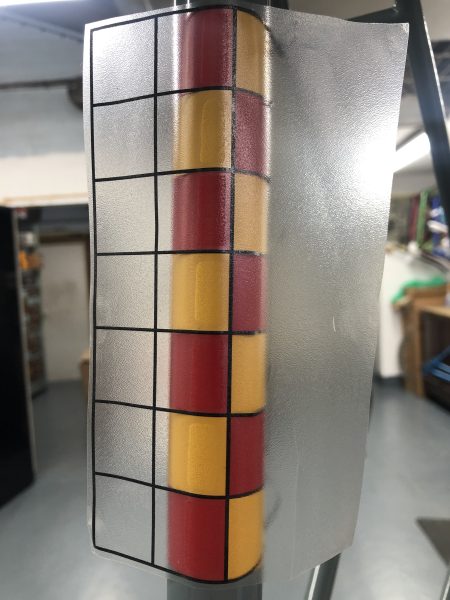
The checkerboard seat panel was the first challenge, red and yellow squares to wrap nice and evenly around the seat tube, with both colours needing a white undercoat over the grey primer, painted on wet and baked between colours, Lee got it spot on after a few trials and tweaks. We then needed to work out how best to line the checker squares with black neat lines, so we created a vinyl pattern to go over the top of the panel, when set over the squares it didn’t quite fit all the way around the tube, (probably due to some mathematical calculation), so we had to line each square individually once the transfer had been fitted to the seat tube.
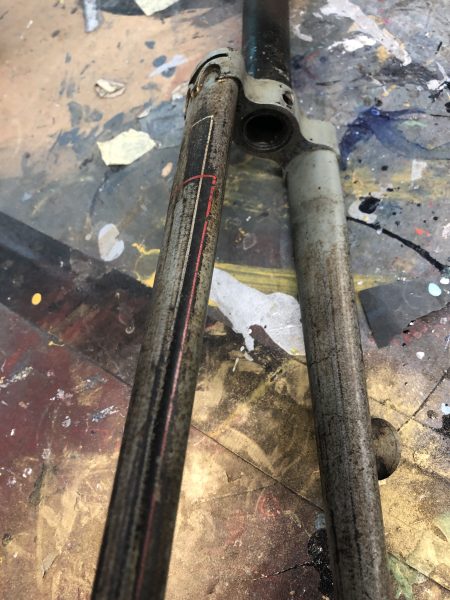
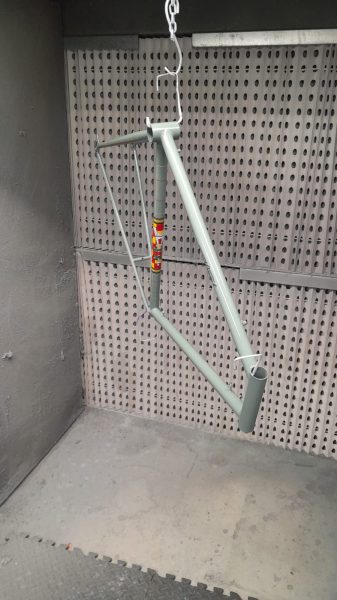
The frame was painted in two or three coats of a colour mix-matched grey enamel and we started to paint the box lining, but found that the rust pitting in all the frame and fork tubes was so bad that the paint was pooling in the little pits on the tubes, making it impossible to get a neat straight line! so back to the beginning, the paint taken off and a few hours of surfacing improvement on all the tubes and repaint once again.
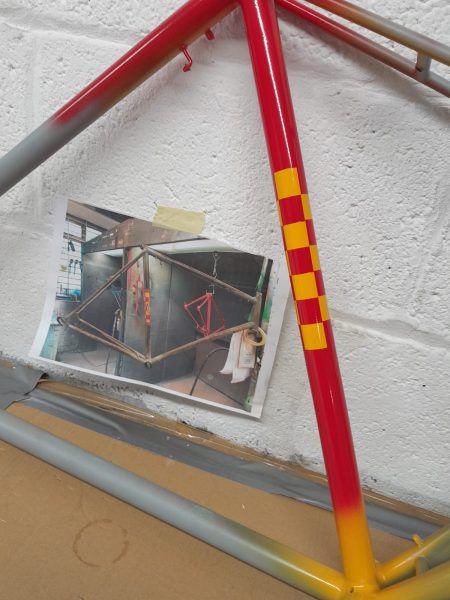
The box lining was done for the second time, red and yellow double line boxes, always a tricky job as you need to make sure that the lines are positioned perfectly, straight and symetrical, get the paint to just the right thickness to flow but not run and once the lines painted – de-mask the guide tapes at just the right time as the thin lines of paint can stick to the tape and be pulled off the tube leaving an uneven line if you’re not careful with timing. Back in the day it would have originally been done free hand and by eye in minutes!
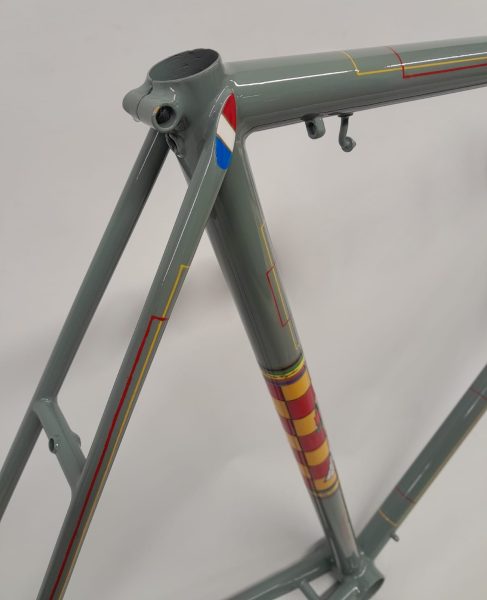
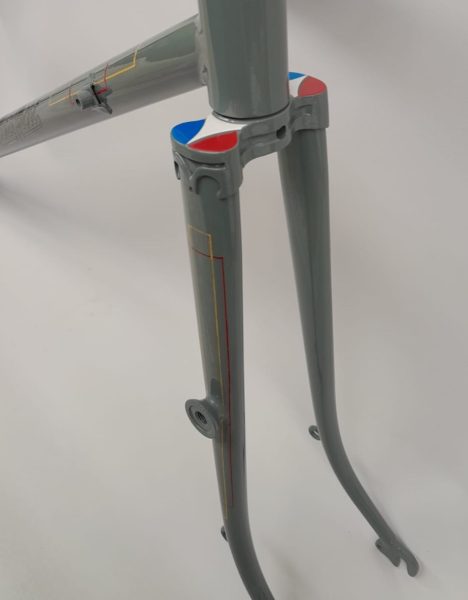
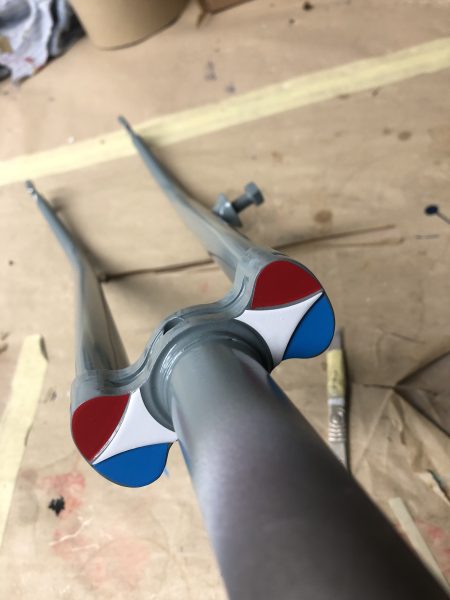
So onto the red, white and blue top eyes and fork tops, made in vinyl for a neat finish, the top eyes at the seat lug with a fine gold line between the colours, all tiny detail that take time but finish the job properly.

The varnish fix (original and obsolete) transfer was fitted to the seat tube using the traditional and difficult method using varnish, white spirit, water and a lot of patience and waited for a couple of days for the transfer to dry. But… as most old varnish fix transfers tend to do these days, it cracked and broke up as it dried and we had to remove it carefully by hand sanding without damaging the seat tube panel and fit a new vinyl replica instead.
So after final finishing touches and all happy with the details, Lee put his coats of varnish to seal in the work and make the whole thing shine! We were that pleased to get it done and off to the customer (who had been waiting patiently) that we didn’t take many photos of the finished job and the ones we did were a bit dark, we but hope you can tell how well it turned out in the end. We crossed our fingers and Bob did a great job packing it to make sure that it arrived safely back in Diss for building up by Mick and the team at Madgetts.
Special mention to Lee who worked hard on the renovation and finish to get it looking good despite a lot of set backs, a team effort on a good job well done.